Tag: chickens

Chickens (Zone 2 – 3)

Hunt and Peck

When thinking about chickens in a permaculture setting, you’re thinking about all the ins and outs in their life cycle. As a livestock animal, their care needs are fairly simple. They need fresh water, food, security from predators, and shelter from the climate. If they are allowed to eat anything but crumble, they’ll need grit for their crops to grind up their food.

They appreciate a dust bath but if you don’t provide that, they’ll construct one of their own. They may construct dust baths in addition, regardless of what you provide. Toss in some diatomaceous earth in to reduce parasite problems.

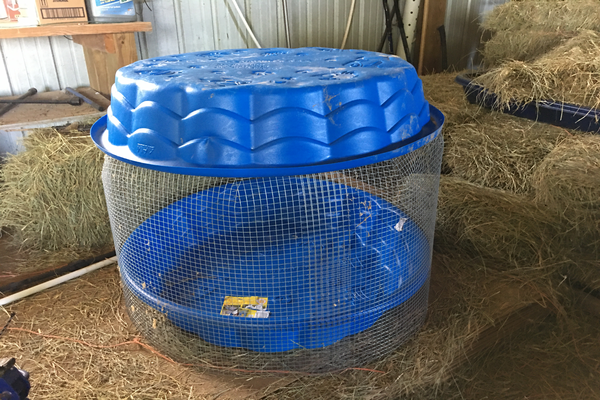
If you are raising chickens for eggs, and you don’t appreciate a daily egg hunt, you’ll want to provide some nest boxes with bedding that is convenient for you to check. If you want said eggs to hatch, you’ll want a rooster and the nests with a pathway to the ground for the chicks to exit without injury.

If your climate is hot, they’ll like shade and access to food and water without having to cross into the sun. If your climate is cold, they’ll need a draft-free place to sleep to protect them from wind, yet ventilated to reduce respiratory infections and frostbite.

You’ll want to locate an egg-layer coop close to your home (zone 1) as you will be visiting them often to check for eggs in the winter to prevent frozen eggs. Having electricity available to warm a water pan will save you from needing to haul water as often.

You will also want a method to deal with soiled bedding and manure. A moving coop is one solution to keep their droppings from building up in one area and is good for fertilizing pasture and gardens that are currently dormant. Deep bedding is another, but you will have to clean it out and move it to a place to compost. Chicken manure is considered “hot” and needs time and carbon to become good fertilizer. That said, as a single collection point, it is an easy way to add nitrogen to your compost pile. Make sure they are located close together.

A note about meat chickens: Meat chicken care is very similar to egg layers, however there are aspects you can skip if you don’t hatch your own, and only raise them seasonally.

We plan to raise some meat chickens in a chicken tractor (probably zone 2) and rotate them in the pasture with a electronet fence to let them forage for bugs and grass. We’ll buy enough chicks in the spring to cover our needs for the year and harvest them before winter to save on labor.

The ducks are 3 months old now

3 months old

We are all very impressed with how much the Muscovies have grown over such a short period of time. Granted, they eat more than the chickens, but I imagine that will slow some as their growth needs also slow. We have picked the 2 drakes we intend to keep to maturity and cull the other 4 next month. In the end, we will cull to just one after we decide which one does the better job with the girls.

Simple Pool Brooder: Part 2

I placed the water catchment in the bottom of the pool and put the drying racks on top. The catchment is just a foil pan from the grocery store. I used two racks to make sure the holes were small enough. I could not find anything on the internet about how big a hatching’s feet would be.

I surrounded the catchment with rabbit bedding (bag claims better absorbency) and put the brooder plate in. I keep the legs uneven in height until I know how tall the babies are and adjust accordingly. Right now there’s about a 1 inch gap at the near end and a 3 inch gap at the far end. If the legs settle too much, I’ll drop some 2×4 blocks in to keep it from sinking.

Final steps

I put the feeder and waterer in to check that everything fit. The red one will be for food, the blue for water. If you follow the cords up to the right, you can see my temperature monitor on the greenhouse rack. My daughter used it for her gecko. It’ll shut the power off at whatever temperature I set it to and I can see at a glance what temperature it currently is. Once I get that stabilized, I’ll add a blanket to put around the back side to reduce drafts. Then we just wait for the eggs to hatch. ^_^

Simple Pool Brooder: Part 1

Sizing the hardware cloth

Step 1: I decided to put the hardware cloth around the outside of the kiddie pool to give my ducklings the maximum floorspace. I wrapped the fence around the pool and gave myself a 4 inch overlap.

Step 2: I made sure the cut ends left me some wire to bend and fasten the ends tightly together. Where needed, I cut the vertical wires away from a horizontal to give me longer wire to work with.

Step 3: In order to make the top of the fence fit inside of the kiddie pool lid, I cut darts into the top of the fence to angle it in. I cut 8 squares down and overlapped 2 squares. You have to feel out the fit a few times with whatever lid you use.

I made 8 cuts so the top looks a little like an octagon. Now to finish up with the lid…

Perfect!

Step 4: I drilled 2 holes in opposite sides of the lip of the pool lid. I wired the top onto the fence. One wire acts as a hinge, and the other acts as a closure and holds the lid steady. I’ll post again when I have all the gear inside for the ducklings.

Little Plucky Hens

Buff Orpingtons and Silver-laced Wyandottes

Chickens were our first foray into farm animals. They are funny little creatures; our breeds are inquisitive, gentle, and they have sweet dispositions. Perhaps we raised more chickens than we need but the work they do is invaluable. They have reduced the amount of ticks, grasshoppers, and other insects on the property all while feeding themselves extra protein. Their eggs have fed our family and sometimes we are at a loss to find another recipe to cook to use all the eggs. This spring, they helped us knock down all the old straw bales and spread them out as mulch for the walkways.

I can’t say enough about our humble little chickens and our little homestead would be much poorer without them.