Month: June 2021

Tamworth Pigs: Five Month Update

Muddy Babies

It’s hard to believe they’ve grown so much since we brought them home in March. Follow this link to see how little they were on their first day with us: https://autumndawn.net/blog/2021/03/16/we-have-piggies/

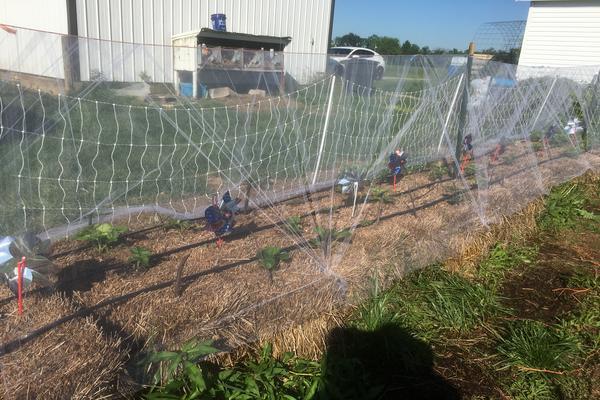
We are waiting on some fence posts from Timeless Fence to get them moved to their permanent location by the woods. They already have a shed down there to move into.

(I’m trying out a new video editor, please excuse the watermark.)

Ducklings first bath!

First bath!

It was time to clean the brooder so we took advantage of the kiddie pool lid and let them splash about while we emptied the old bedding. They had a blast and my garden has a little more mulch. Afterwards, we slid the fence off the pool and set it in the grass. They romped around in the grass, then settled down and started preening while I refilled their bedding and got their heaters set up. Once back in the brooder and preening was done, everyone took a long 15 minute nap.

Simple Pool Brooder: Part 3 – New Muscovy Ducks!

Our hatching did not go as planned. The days the eggs were due to hatch, I was away on vacation for my wedding anniversary. My husband had planned a trip for us for our 11th anniversary. We had originally intended to go on our 10th but Covid happened. I did not want to postpone again.

Instead, I trained my adult children to watch over the temperatures and the humidity. They had 2 eggs hatch and another that had pipped and was starting to unzip, but died in the egg. One of the ducklings died over night the night before I got home. We had one lonely duckling.

My husband jumped on Craigslist and found a post for baby Muscovies that had hatched a week prior. I called them up and they hadn’t sold any. They had nine ducklings that needed a home and I took them all. Our little duckling is much happier now. Have a look:

10 little duckings!

My Strawberries Have Their Own Tent

Tulle Tents!

I haven’t had any issues with birds getting to my strawberries this year. Mostly because they’ve only just started ripening and I put plastic pinwheels in the bales to scare them off. Today, I decided it was better that the strawberries have protection from above. They can self-pollenate, but there are also gaps where a bee could get in and help out if they wanted.

Simple Pool Brooder: Part 2

I placed the water catchment in the bottom of the pool and put the drying racks on top. The catchment is just a foil pan from the grocery store. I used two racks to make sure the holes were small enough. I could not find anything on the internet about how big a hatching’s feet would be.

I surrounded the catchment with rabbit bedding (bag claims better absorbency) and put the brooder plate in. I keep the legs uneven in height until I know how tall the babies are and adjust accordingly. Right now there’s about a 1 inch gap at the near end and a 3 inch gap at the far end. If the legs settle too much, I’ll drop some 2×4 blocks in to keep it from sinking.

Final steps

I put the feeder and waterer in to check that everything fit. The red one will be for food, the blue for water. If you follow the cords up to the right, you can see my temperature monitor on the greenhouse rack. My daughter used it for her gecko. It’ll shut the power off at whatever temperature I set it to and I can see at a glance what temperature it currently is. Once I get that stabilized, I’ll add a blanket to put around the back side to reduce drafts. Then we just wait for the eggs to hatch. ^_^

Simple Pool Brooder: Part 1

Sizing the hardware cloth

Step 1: I decided to put the hardware cloth around the outside of the kiddie pool to give my ducklings the maximum floorspace. I wrapped the fence around the pool and gave myself a 4 inch overlap.

Step 2: I made sure the cut ends left me some wire to bend and fasten the ends tightly together. Where needed, I cut the vertical wires away from a horizontal to give me longer wire to work with.

Step 3: In order to make the top of the fence fit inside of the kiddie pool lid, I cut darts into the top of the fence to angle it in. I cut 8 squares down and overlapped 2 squares. You have to feel out the fit a few times with whatever lid you use.

I made 8 cuts so the top looks a little like an octagon. Now to finish up with the lid…

Perfect!

Step 4: I drilled 2 holes in opposite sides of the lip of the pool lid. I wired the top onto the fence. One wire acts as a hinge, and the other acts as a closure and holds the lid steady. I’ll post again when I have all the gear inside for the ducklings.