It was time to clean the brooder so we took advantage of the kiddie pool lid and let them splash about while we emptied the old bedding. They had a blast and my garden has a little more mulch. Afterwards, we slid the fence off the pool and set it in the grass. They romped around in the grass, then settled down and started preening while I refilled their bedding and got their heaters set up. Once back in the brooder and preening was done, everyone took a long 15 minute nap.
Year: 2021
Simple Pool Brooder: Part 3 – New Muscovy Ducks!
Our hatching did not go as planned. The days the eggs were due to hatch, I was away on vacation for my wedding anniversary. My husband had planned a trip for us for our 11th anniversary. We had originally intended to go on our 10th but Covid happened. I did not want to postpone again.
Instead, I trained my adult children to watch over the temperatures and the humidity. They had 2 eggs hatch and another that had pipped and was starting to unzip, but died in the egg. One of the ducklings died over night the night before I got home. We had one lonely duckling.
My husband jumped on Craigslist and found a post for baby Muscovies that had hatched a week prior. I called them up and they hadn’t sold any. They had nine ducklings that needed a home and I took them all. Our little duckling is much happier now. Have a look:
My Strawberries Have Their Own Tent
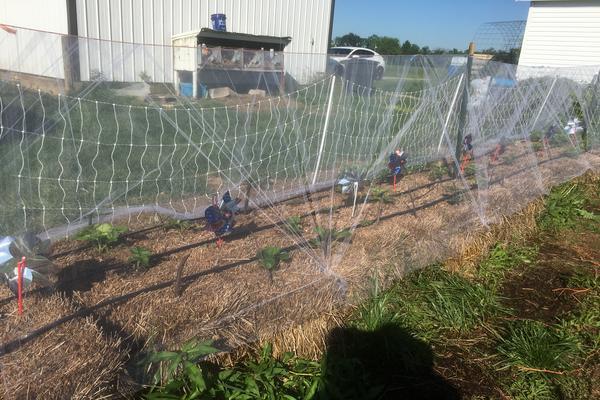
I haven’t had any issues with birds getting to my strawberries this year. Mostly because they’ve only just started ripening and I put plastic pinwheels in the bales to scare them off. Today, I decided it was better that the strawberries have protection from above. They can self-pollenate, but there are also gaps where a bee could get in and help out if they wanted.
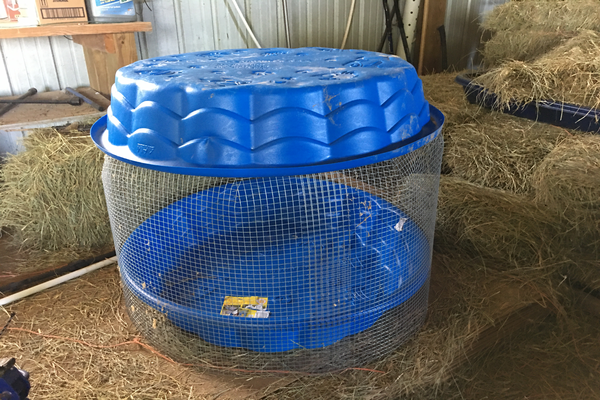
Simple Pool Brooder: Part 2
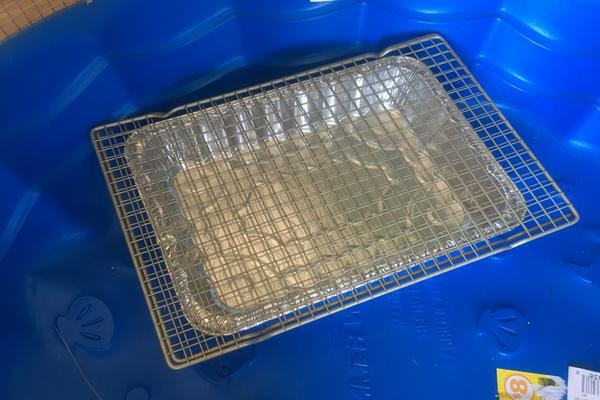
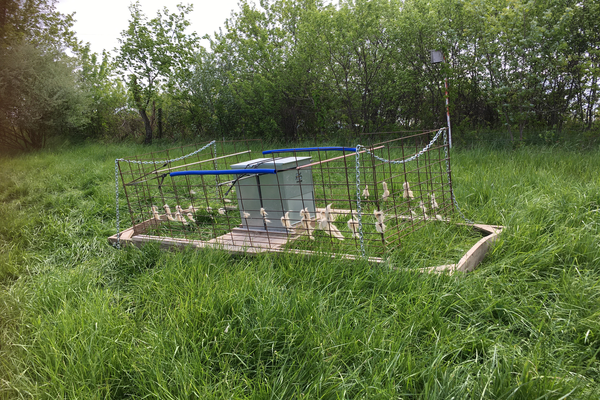
I placed the water catchment in the bottom of the pool and put the drying racks on top. The catchment is just a foil pan from the grocery store. I used two racks to make sure the holes were small enough. I could not find anything on the internet about how big a hatching’s feet would be.
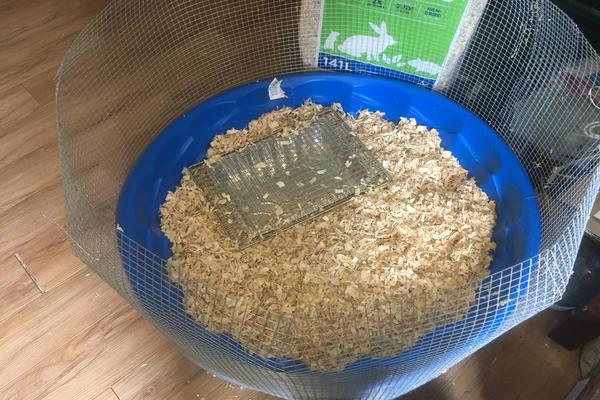
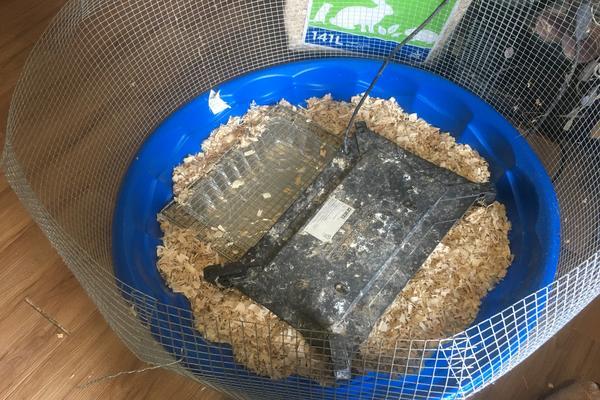
I surrounded the catchment with rabbit bedding (bag claims better absorbency) and put the brooder plate in. I keep the legs uneven in height until I know how tall the babies are and adjust accordingly. Right now there’s about a 1 inch gap at the near end and a 3 inch gap at the far end. If the legs settle too much, I’ll drop some 2×4 blocks in to keep it from sinking.
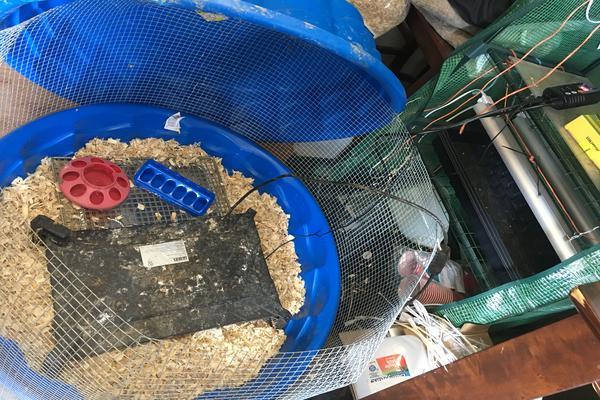
I put the feeder and waterer in to check that everything fit. The red one will be for food, the blue for water. If you follow the cords up to the right, you can see my temperature monitor on the greenhouse rack. My daughter used it for her gecko. It’ll shut the power off at whatever temperature I set it to and I can see at a glance what temperature it currently is. Once I get that stabilized, I’ll add a blanket to put around the back side to reduce drafts. Then we just wait for the eggs to hatch. ^_^
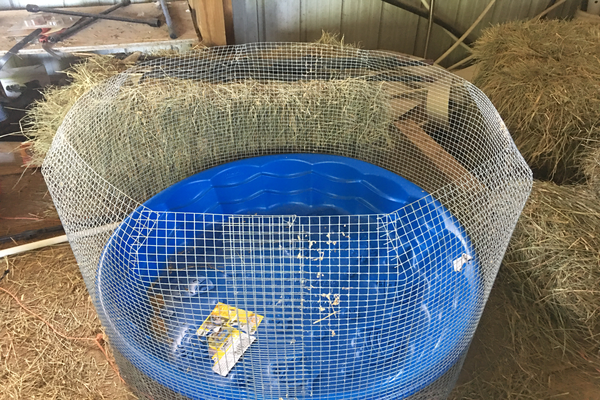
Simple Pool Brooder: Part 1
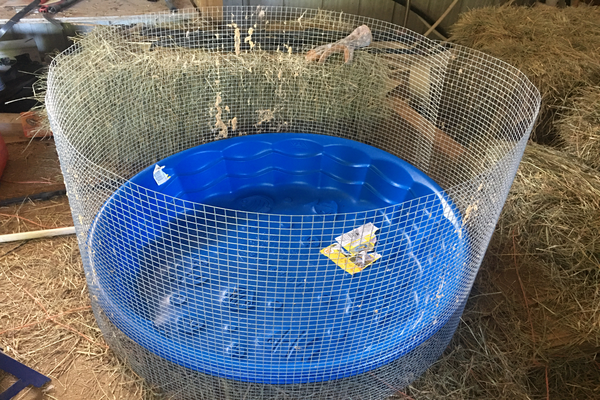
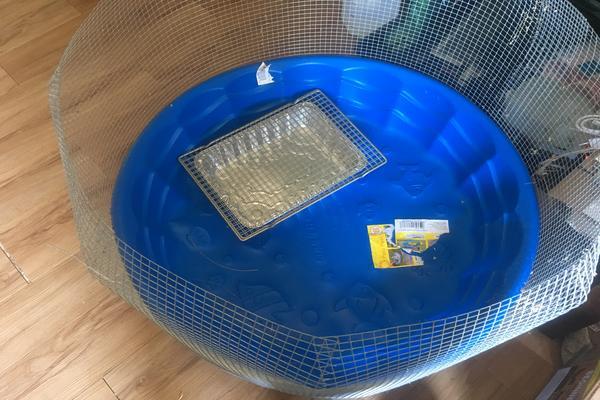
Step 1: I decided to put the hardware cloth around the outside of the kiddie pool to give my ducklings the maximum floorspace. I wrapped the fence around the pool and gave myself a 4 inch overlap.

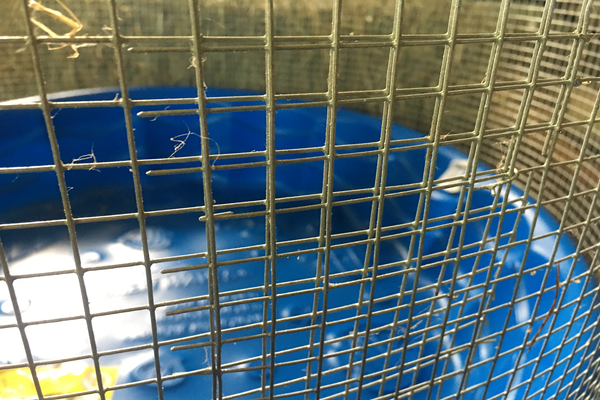
Step 2: I made sure the cut ends left me some wire to bend and fasten the ends tightly together. Where needed, I cut the vertical wires away from a horizontal to give me longer wire to work with.
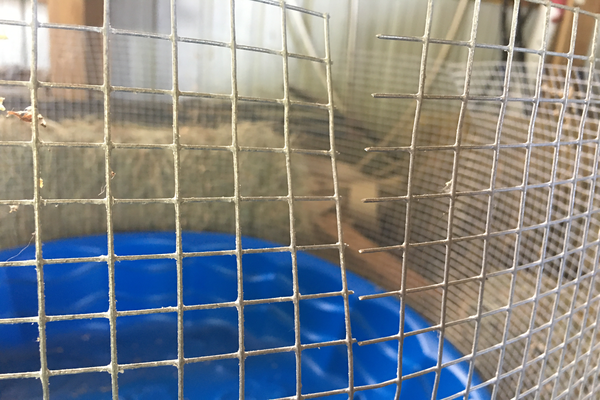
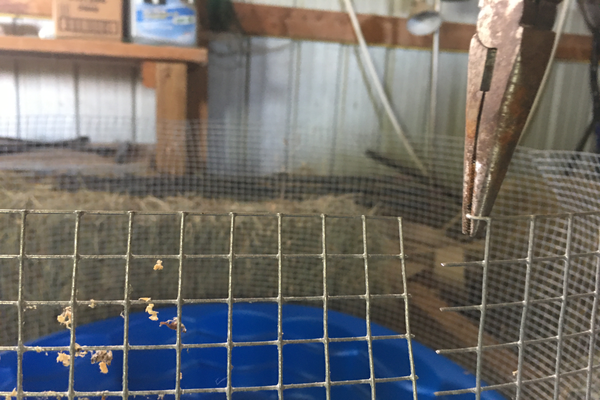
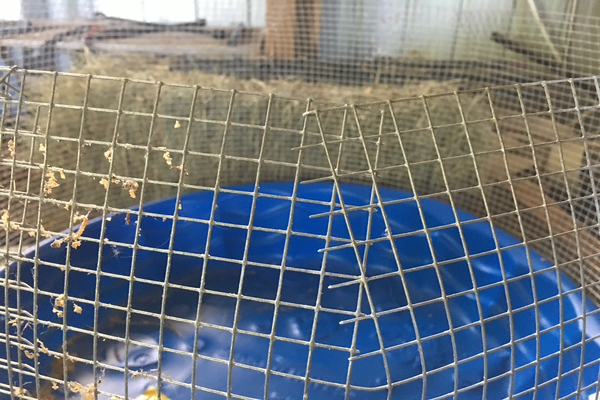
Step 3: In order to make the top of the fence fit inside of the kiddie pool lid, I cut darts into the top of the fence to angle it in. I cut 8 squares down and overlapped 2 squares. You have to feel out the fit a few times with whatever lid you use.
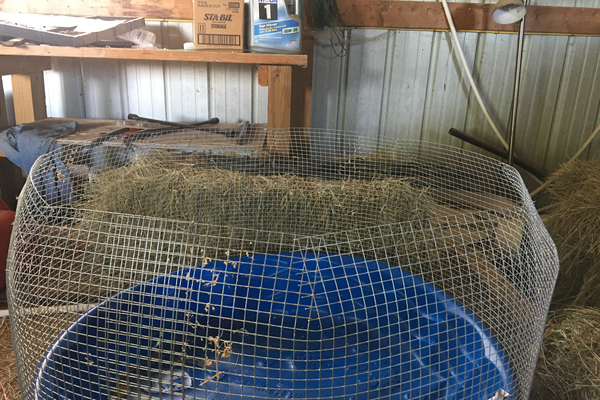
I made 8 cuts so the top looks a little like an octagon. Now to finish up with the lid…
Step 4: I drilled 2 holes in opposite sides of the lip of the pool lid. I wired the top onto the fence. One wire acts as a hinge, and the other acts as a closure and holds the lid steady. I’ll post again when I have all the gear inside for the ducklings.
New additions for May of 2021


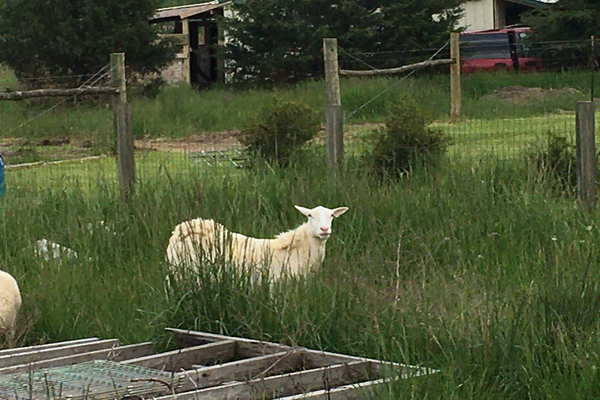
As you can see, we’ve been busy making homes for our new additions. The adult rams have been moved to the lower pastures to work on those. Once these new sheep have passed quarantine, they’ll join our other ewe and the baby rams will be removed to their own pasture until breeding season.
The piggies are currently getting wire trained (they do not like the ouchie wire) and have a waterbarrel with a pig nipple to drink from.
The garden is coming along, though I am late getting my beans in. Tomorrow is another day!
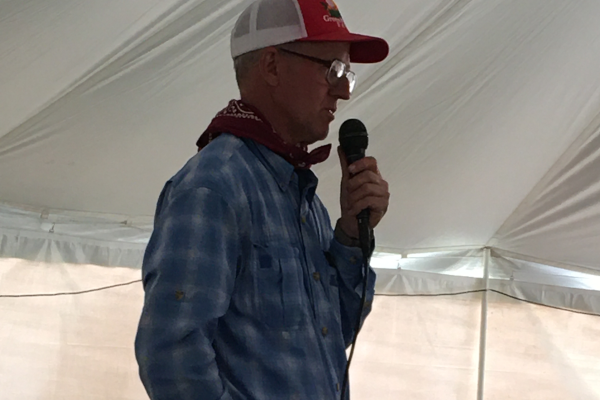
Greg Judy’s Grazing School
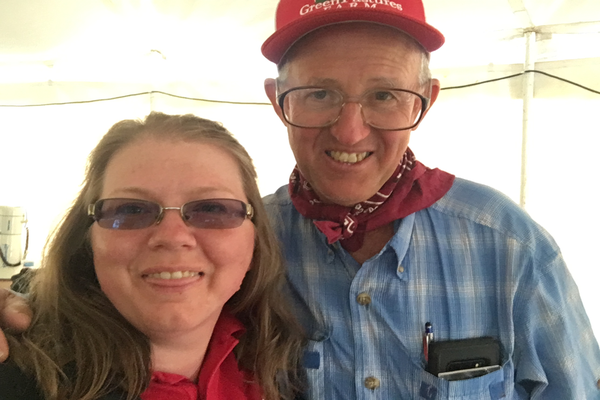
I attended Greg Judy’s grazing school May 6th, 7th, and the 8th this past week and let me tell you, it was worth every penny I spent. Greg and Jan Judy are some of the nicest, caring, and humble people you could ever wish to meet. Greg tells you about all the mistakes he’s made over the years and what those mistakes cost him. He helps you understand the solutions to those mistakes in a way that sticks with you and really shortcuts the hard learning curve you’d have otherwise.
Greg Brann was a guest speaker at the event and he shared a wealth of knowledge of forage types and management. I learned more about grasses and legumes, warm and cool season plants, perennials and annuals, and forage trees than I ever knew existed. I will be looking for the resources he recommended and start learning what’s in my pastures and start to increase my varieties for my ruminants.
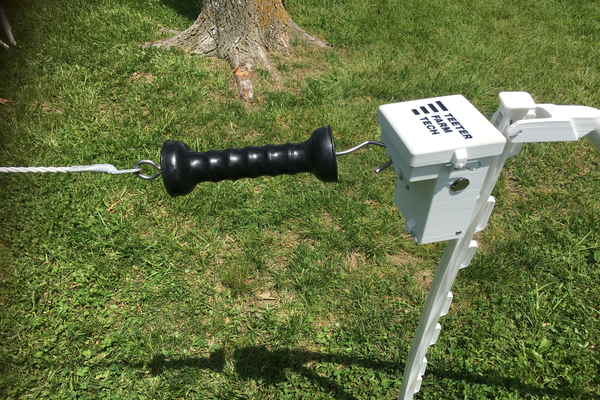
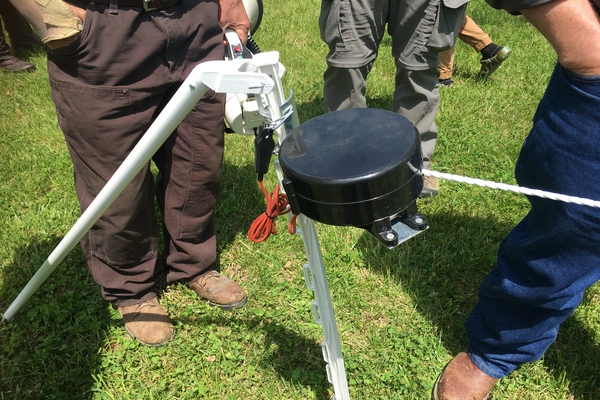
Greg Judy had vendors on-site providing information on the posts he uses, his bale unroller, and a new gadget that has a gate release on a timer for moving herds/flocks when you can’t be there. Greg and the interns also gave us a fencing demonstration that really helped me grok how things all fit together.

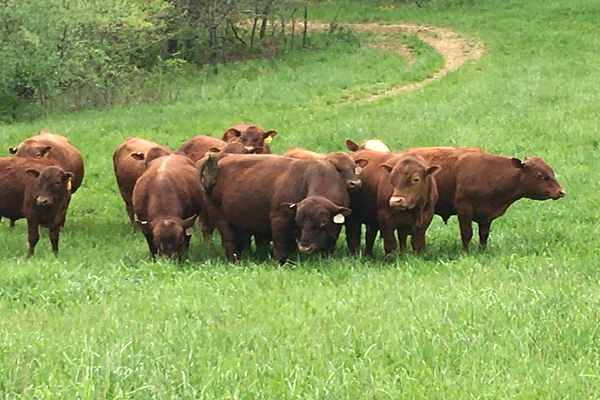
We saw three different farms while we were there. The first had the calf/cow mob and we got to see them moved onto fresh pasture. His cows were so gentle and good natured, we were standing right out in the middle of them and they had some calves that were only a week old. I was even able to coax one curious cow close enough to sniff and lick my hand. The second farm, we were able to see Greg’s bull mob. His eldest bulls were from 2017/18 and they just exuded strength and masculinity. The South Poll breed is definitely one to check out if you’re interested in beef cattle. Greg’s are raised with zero grain and their body condition is second-to-none.
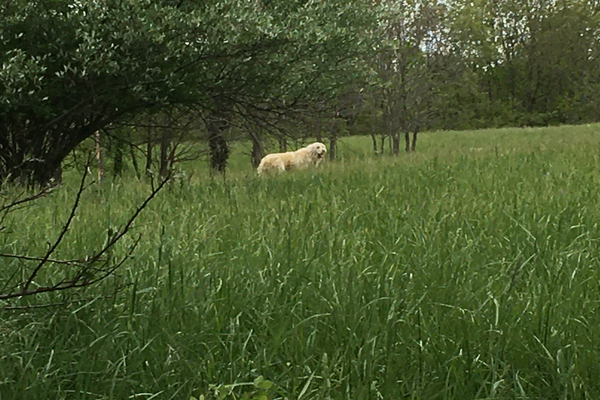
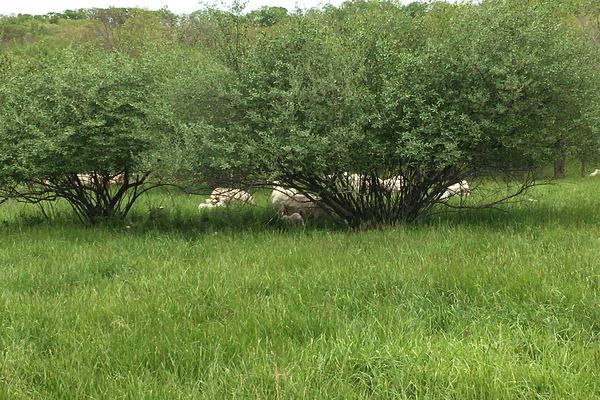
The third farm we visited had the sheep flock gathered with the livestock guardian dogs. They were in the middle of lambing and we didn’t dare venture too close as we didn’t want to spook any ewes into abandoning their lambs. These sheep lamb in pasture and receive no interventions. Mother nature culls the weak. They were a mix of St. Croix, Katahdins, Black Belly Barbados, and another hair-sheep breed I couldn’t quite catch the name of. They are tough sheep, raised strictly on forage, no worming, and no grain. Greg’s dogs are well trained guardians and they were doing their job barking at all of us and making sure we didn’t get too close.
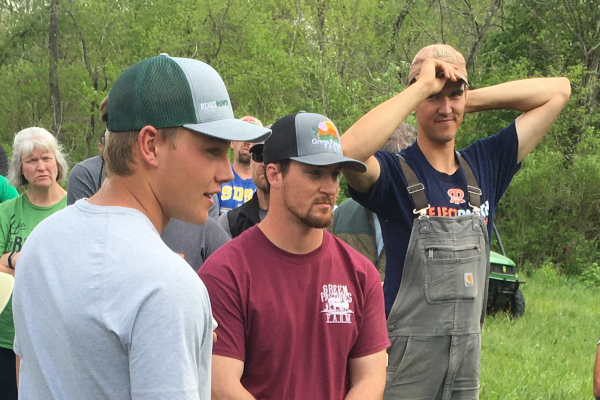
In addition to all this, we got to talk to the interns you see in Greg’s videos and these young men (22 and younger) are well on their way to being able to run a successful farm in their own right. Ben, Isaac, and Conner were friendly and happy to share their experience with all of us. We also got to meet Greg’s first lease owners. They were gracious enough to host the event on their lawn and helped out with all the logistics of parking, feeding, and helping us find our way. They are truly lovely people and I hope our paths cross again.
On the whole, I made some great contacts that I’ll be keeping in touch with. I learned enough about high-tensile fence to be able to install some on our property. I learned how to stockpile our entire homestead for winter feeding and really cut down on our hay costs. I learned about a lot of various trees from another attendee that I want to incorporate into our paddocks to give our sheep some variety. I also was able to share some things I had already learned with others (how to tip a sheep on its butt, establishing dominance, and recapturing sheep) and it felt good to be able to give them options they had not thought of.
Thank you, Greg Judy. You don’t know it, but you are my grazing mentor. ❤
Quick Cold Frame
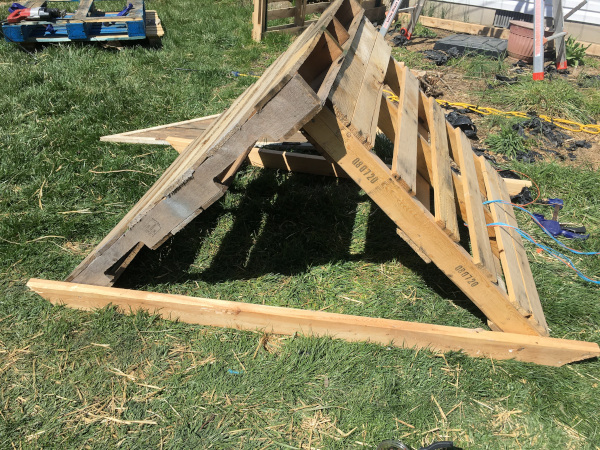
Stack of junk? 
Hidden garden
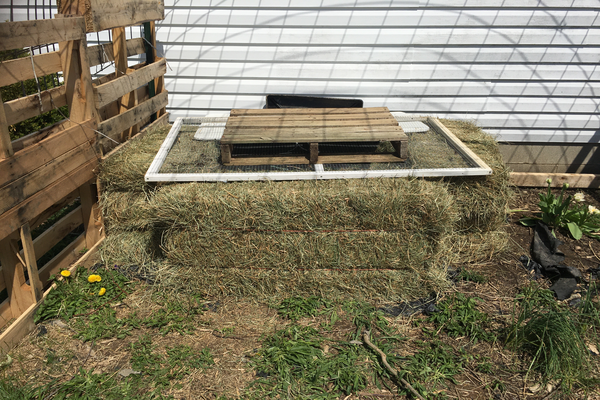
Some of my starts had outgrown my indoor green house so I needed to move them outside. I needed to harden them off and I still needed to protect them from the wind, rain, and chickens. Cold frames seemed to be the answer.
I had never built one before but I needed one quick. I laid out four hay bales leftover from winter feed and set the plants inside on the ground. I have a piece of clear polycarbonate that I rescued from someone’s bulk trash day, a hardware cloth panel from a coop we took apart, and a tiny skid. The poly covers the plants overnight and when it’s chilly. The hardware cloth keeps the chickens out when I can take the poly off or it sits on top of if to keep the wind from lifting it. The skid provides dappled shade through the day and adds weight on windy days.
Cost of project: time
Construction projects
The piglets are growing fast and are going to need a little more space to stretch out. It’s not pretty and needs a tarp tacked on, but I can pull it with a rope and move it with the pigs.

This is the beginning of a greenhouse. There used to be a small tree and some flowers here but this is south-facing real estate and I need a place to put my starts when they outgrow the indoor greenhouse.